Normal Patterns
This sections explains normal patterns that Kazeros uses throughout the whole g2-2.
Burrow
🗒️Explanation
Kazeros burrows himself and reappears in another location requiring a counter.
✅Useful information
He deals damage during the burrow and unburrow knocking people. You need push immunity for both of those.
He constantly swaps aggro during it so you can use that to reposition him closer to the middle by stacking together.
Blink counter
🗒️Explanation
Kazeros dissapears and reappears with an uppercut knockback into a counter.
If you fail the counter he will deal damage in front of him.
If no one gets hit by his uppercut there wont be a counter and he will instead start a new pattern.
✅Useful information
You can follow his movement with a minimap/bleed rune.
His uppercut requires push immunity. If your counter is long enough and has push immunity (ex. artist) you can use it the moment he reappears.
Blink Co-op counter
🗒️Explanation
Kazeros will disappear 4 times and reappear with a diferent pattern each time. The order of the patterns is:
Knockback uppercut -> Charge -> Guard -> co-op counter.
If you failed the guard then the co-op counter will not appear, which means you cant stop him from doing 360 AOE.
✅Useful information
You need push immunity for the uppercut and only para immunity for the charge.
You can also use this pattern to reposition Kazeros closer to the middle, but only on the first 2 motions. During the guard he already locks his position and will aim towards that side.
Kaisa
🗒️Explanation
Kazeros targets one person and slides towards one direction while sending barrage of missiles towards 5(?) players. After that he spawns orb in front of him towards targeted player which deals repeated damage till it disappears. Then he repeats the same pattern while targeting another player. Make sure to not overlap the missiles and also get out if you are being targeted by the orb.
✅Useful information
This pattern deals a lot of damage so it is advised to just not risk it unless you have awakenings from support and DR ready, but you should still avoid stacking all 8 people, which is why everyone just outranges it.
You dont need anything for missiles and only para immunity for the final hit of orb.
Clones
🗒️Explanation
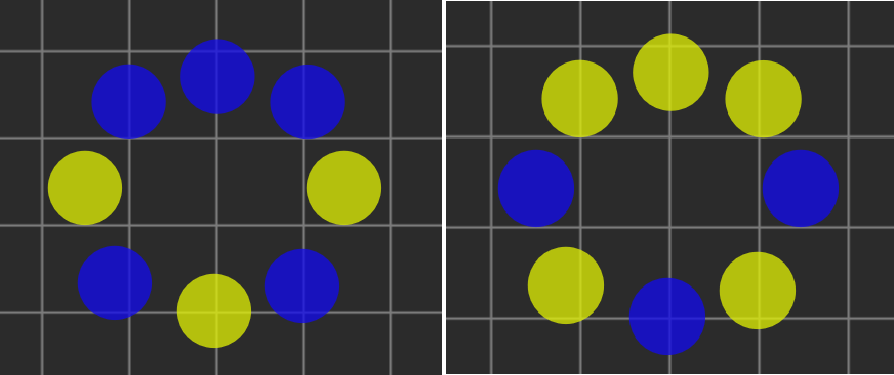
Kazeros spawns 8 clones - 3 of the same colour and 5 of the other. Safe spot will be the clones which count is smaller, while the others will thrust forward. After that orb will spawn inside of the clones shoting rotating beams from both sides that imprison any players who get hit by them. Then Kazeros will appear with a lots of 2 coloured cuts around the map.
✅Useful information
If you managed to hide in the safe spot you can ignore the cuts - they wont do anything to you and its a free dps window. If you stood on the wrong one then you will get sent flying and take damage from the cuts. If you push immune you wont get sent flying (need to test it), but you will still take damage from the cuts. Supports should shield/DR people who failed this mech.
You can see the starting positions of beams just before clones thrust foward. After they spawn you have 1-2 seconds to move out of them.
There is another way to differentiate which clone is safe - If there are 2 clones of the same colour next to each other this means that colours is not safe. It also helps with there being only 2 variations which looks exactly the same with only the colour being changed.
4 Black Orbs
🗒️Explanation
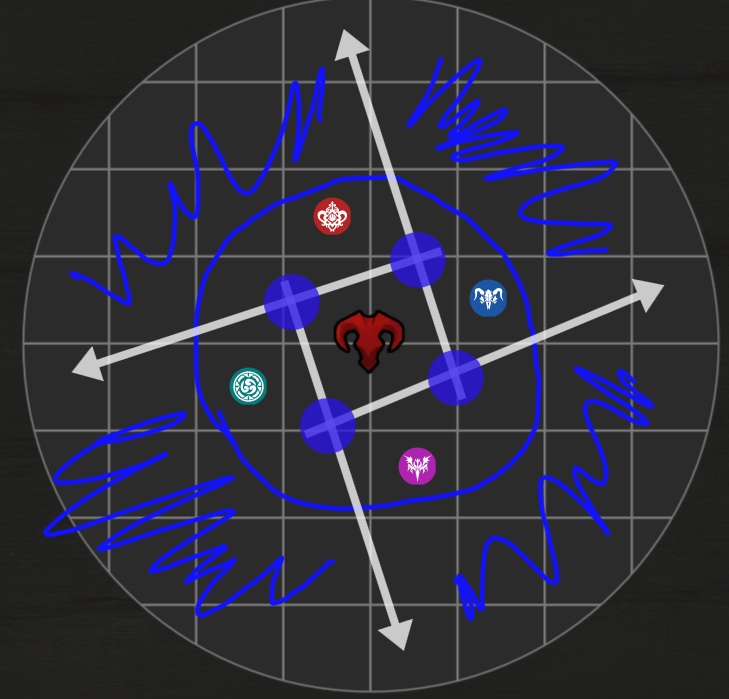
Kazeros will cover whole map with black fog which deals heavy damage except for the zone around him. He will then pull players towards him and spawn 4 black orbs around him that will try to push players outside of the safe zone. They also explode at the end of their movement, which means if they do push you out, you will die to the combination of their explosion + fog.
✅Useful information
You can use para immunity to prevent being pushed out. You need at least 4-6 seconds to be completely safe, but you can queue one skill into another one. The orbs themselves dont deal that much except for the final explosion.
There is also a safespot for that mech if you have nothing ready. You can stay between the 2 orbs on the edge in a way that it will not hit you.
Below you can see the exact pathing the orbs take and where you should be standing. Orb will always fly in a straight line towards the orb in front of it.
Spin
🗒️Explanation
Kazeros will dash towards one direction and then towards a diferent one. After that he will do a 360 spin spawning pizza cones around him rotating clockwise.
✅Useful information
You can push immune through it or spacebar over in the direction they are coming from.
Orbs
🗒️Explanation
Kazeros spawns multiple small orbs around that merge into big ones and then explode. After the merge he also targets one person and slams him after the orbs explode.
✅Useful information
Its a good dps pattern so supports should shield/DR. You do need push immune to tank explosions + slam.
Make sure to move out from his hit after the orb explosion. You can also just tank it with shields, it doesnt deal that much damage.
Lauriel
🗒️Explanation
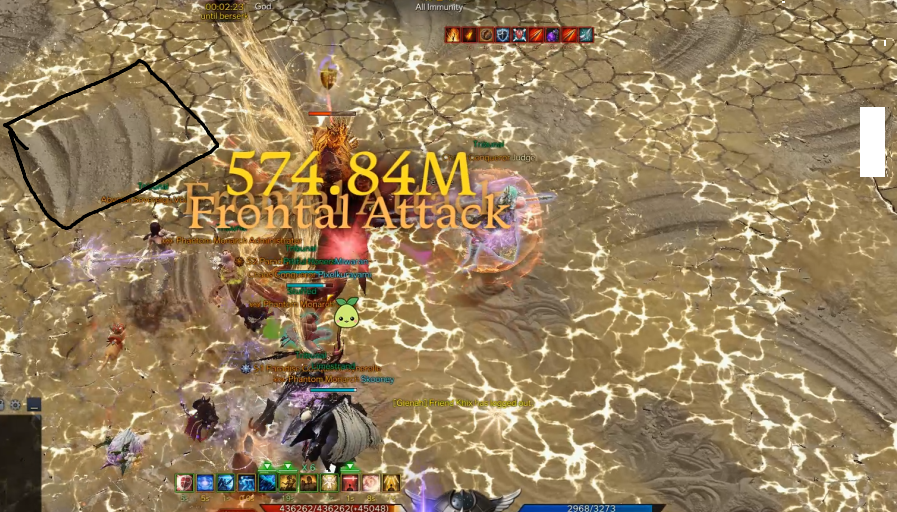
Kazeros dashes 4 times in the air and then slams down dealing damage and knocking any players hit. After that he creates an expanding explosion in front of him in 270 angle with only his back being safe which pushes players.
✅Useful information
You need push immunity to tank the slam, but you only need para immunity to tank the waves, except for the last one which is push immune.
If you are in front of him during the slam just stay there. This way, if the boss is targeting you, you wont spin him around. You can just lay on the ground or use para immunity skill.
Grab
🗒️Explanation
Kazeros pulls players in with 2 explosions - first one being in safe, second one being out safe. After 2nd one he will dash forward and if he managed to grab somebody he will pin that person to the ground creating donut explosion around him.
If he doesnt grab anyone then he wont do a pin down.
✅Useful information
You cant para immune/push immune those explosions - you will get forcefully pulled in if you get hit. If you dont have any dash available you should be standing close to it so you can walk out after the first one.
Make sure to not stand right behing him if he pinned somebody. When he slams that person it will deal damage around Kazeros so you might get knocked down.
Its a dangerous pattern if you dont have a stand-up after it. He might do a pattern that covers whole map in a black fog and you will be just laying on the ground during it if you get hit.
Guard Charge
🗒️Explanation
Kazeros covers map with a black fog except for his front and back. After a brief moment he will charge forward with a guard animation on which you have to stay in front of him.
If you fail it, after a few seconds you will create a lingering explosion under you which will proc QTE for anyone that steps into it (mash spacebar). It also explodes a moment later which deals insane amount of damage to any players standing in it. Make sure to get away from the others if you get it or call it out.
✅Useful information
Prioritize not failing the guard over anything. If 1 person gets caught its okeyish, but if 2 get caught, and they overlap with the puddles, they will kill each other - Its around 300k damage per puddle just from the final explosion.
If you stay behind him you will also get that puddle so you are force to do the guard.
You can use that pattern to reposition him towards middle.
Triple Guard
🗒️Explanation
Kazeros will perform 4 motions with the initial 3 being guards.
AOE explosion around him -> Cleave front -> cleave back -> Front slam + Rotating cones around him.
✅Useful information
Cones always starts from his front and they never reach his back.
During this pattern he targets one random person during the first spin. After that he will cleave towards the opposite side from him and then rotate 180 and cleave again. Then he retargets the same person again and does a slam. That means if you started on the opposite side of the first cleave you do not want to move.
If you get hit by his first AOE you will get inflicted with a 'blind'. Its a debuff that makes you unable to see indicators for upcoming guards. In that case you will have to guard by looking at the boss animation. It can also be cleansed
Waffle
🗒️Explanation
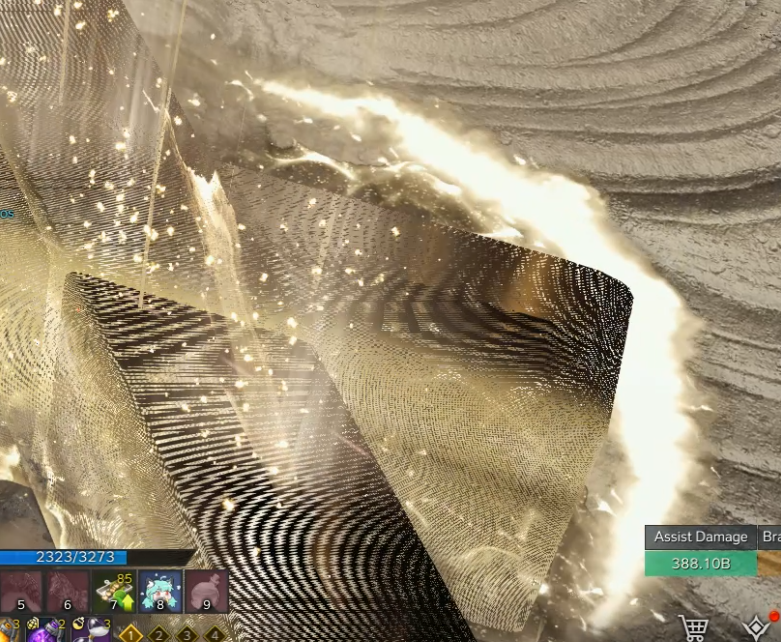
Kazeros ascends and dives in front of him creating a waffle pattern on the map.
✅Useful information
You need push immune to tank it.
This pattern has a scripted layout so try to figure out where can you safely stand on it. To give you an example - there is always a larger square on his left side for ranged hitmasters to stay in.
You can also stay in front of him if you want an easy access to his back. His dive will go over you and you will be right on his back.
Walls
🗒️Explanation
Kazeros spawns 3 walls that will charge forward after a brief moment and drag any players along the way.
If you do get hit by a wall the boss will charge towards you and then do a cleave. This happens 2 times with 2nd time on a random person, prioritizing people who got hit by the walls.
✅Useful information
You can use push immune to not get dragged forward (spacebar lingers long enough).
To see which way walls will charge you have to pay attention to 'waves' that comes out of them. They indicate direction of the charge.
Vortex
🗒️Explanation
Kazeros will transform into a vortex slightly moving towards one direction and then continuously towards another (possibly locked onto one of the players?) spawning around black puddles with a safe spot being on top of him. If you leave the safe spot you will get dragged along. Blue puddles inflict paralysis which will pretty much forcefuly make you leave safe spot. After that he will drop on top of one person with a safe spot being out and then in.
✅Useful information
You need para immunity for first knockback and push immunity for the landing.
Stack
🗒️Explanation
4 people will drop large aoes under them after a few seconds. Kazeros will also descend behind them and spawn cones coming out of him 2 times which immobilize any players who get hit. During that he will also target one random player and shot out projectiles towards him at after the cones.
✅Useful information
You want to stack with each other to overlap the puddles and dash side/behind Kazeros.
You can also use that pattern to reposition Kazeros closer to the middle.
Player, who is targeted by the Kazeros, should walk far away from him after the 2nd cone to not hit others with the projectiles.
Stagger Walk
🗒️Explanation
Kazeros will cover whole map in black fog except for small area around him. He will then start to walk forward while spawning yellow pillars around him that activate after a moment and immobilize any players getting hit by them. During this walk you have to stagger him. After the stagger he will target one player and beam him. If you succeed the stagger you get more time after that to move away after he locks on you. If you fail the stagger he will shoot almost instantly.
Succeeded the stagger:
Failed the stagger:
✅Useful information
The pillars have 2 hits - the moment they activate and the moment they desactivate. Other than that you should be able to safely walk through them. You can also push immune them.
Try to not rotate the boss when you are being the one targeted by the beam. He locks onto you so wait a moment and you can safely walk out of it or push immune it (it hurts so you need support's care)
Slow Flight
🗒️Explanation
Kazeros will slowly fly around the map spawning lines all over the place which deal small amount of damage. After 2 sets of them he will then throw his sword in front of him which explodes in a large area. This pattern has 2 variations.
1. No cone:
This one does a small knockback and imprisons any players hit by it.
2. Cone:
This one does a small knockback as well and imprisons any players hit by it. Main difference is that this one deals massive damage and also has a safespot which you should head to before the explosion happens.
✅Useful information
You should use splendid sacred bombs on both of these variations to prevent getting imprisoned.
You can outrange it as well - its a time waste pattern anyway, you cant do much during it. If you do not want to do that you should play closer to the outside. and then spacebar in/walk in to get to the safespot/splendid sacred bomb.
You need push immune to tank the lines and para immune for the knocback.
Orbital Strike
🗒️Explanation
Kazeros spawns large explosions around the map and performs 2 guards during it. If you fail a guard he will pull you towards him and deal high damage which requires shielding/DR.
✅Useful information
The guard range is quite large, but doesnt cover the map fully. Explosions also only appear inside the guard range, but can sometimes overlap by spawning under you when you are about to perform another guard. You can (and tbh you should in TFM) outrange this pattern, because its an extremely dangerous one. If somebody fails it he takes insane amount of damage and requires your support to react fast to save you (with even less time with no targetable DR's like artist). Overall its a time wasting pattern.
Purifier Beam
🗒️Explanation
Kazeros sends a beam towards the middle of the map which will slowly travel and stop after a while exploding into a guard pattern at the end. During that Kazeros will charge forward one of the players 3 times and inflict 'blind' on any targets he hits.
✅Useful information
You want to move out of the guard range of the beam. It travel distance is about half of the map so as long as you keep Kazeros in the middle you can safely dodge it. If he does it when he is right on top of the wall you might need to guard it if somebody intercepts it (walks in front of it).
If you want to guard it the timing for that one is when the orb is about to hit the ground (it slowly descends in a place where the beam stopped)
Supports should always DR this pattern if players are inside the range of it.
Triple Pizza
🗒️Explanation
Kazeros will send 3 waves of 4 cones while also spawning lots of explosions around. After the last one he will slam one person (prioritizing people who got imprisoned) and create a cross shape explosion that takes ~1 second to activate.
If you get hit by the cone you get imprisoned. Explosions will push you around.
✅Useful information
Prioritize dodging over everything else in this pattern. You can use your timestop as well to avoid imprison.
Safest spot would be somewhere between Kazeros and maximum range of the cones, but you can also outrange this pattern if you are already on the outside.
Do not try to instantly free other people if you dont have ranged skills. His cross shaped explosion activates faster than you can free them and it requires push immunity to tank. If you just rush in you might get knocked down and waste your time/get-up. Let them others take care of it and wait for the explosion first.
Clash
🗒️Explanation
There are 2 clash patterns in this phase.
1. Directional clash
He targets one player and after a few seconds he will perform a clash which you activate by going to the position he is looking at. Failed clash results in raid wide aoe.
2. 'Forced' clash
This one he forces the closest player to him during the animation to do it. Failed 'forced' clash results in a 360 spin.
✅Useful information
Try to identify the pattern quickly on the 'Direcitonal Clash'. Boss targets one player during it and spinning him around makes it harder to be in a position for clash. Other than that both clashes are very quick which means you can also take them as a support and you wont lose that much uptime or even not at all if played properly.
6 hit combo
🗒️Explanation
Deadly pattern that targets one person with 6 hits. Order of the motions is:
Front cleave -> Front cleave -> Thrust -> Pull in -> Uppercut -> Slash
✅Useful information
His 5 initial hits are guaranteed to target the same player, but the last one is based on something else - who got hit by the 'pull in'. Any players that got hit by it can be targeted by the last slash, which is important to control aggro on this one and stay on the front if you are the one being targeted.
If the boss did rotate during this pattern and multiple people got hit by the 'pull in' make sure to keep him looking towards the same direction. Other than that be ready for that person to get targeted.
You need para immunity for first 4 hits and push immunity for last 2. Supports should DR this pattern if they can.
5 Orbs
🗒️Explanation
Kazeros spawns 5 orbs - 3 of the same colours and 2 of the other. After a moment you will be able to stagger him/counter. This pattern has 2 variations.
1. 3 black and 2 yellow
If black count is higher than yellow then you have to stagger.
1. 2 black and 3 yellow
If yellow count is higher than black then you have to counter.
✅Useful information
You need 4 people for the co-op counter.
You can safely stand right in front of the boss. Hitbox is a bit missleading (its only around the orb location).
If you fail it its a raid wide damage. DR mandatory.